

So, we’ve been busy around here getting ready for some diy Christmas projects! It’s exciting to be making gifts vs. buying, isn’t it? I just feel a special “accomplishment” doing it this way (and it saves money!) and it seems more meaningful. I am using my affiliate links in this post, and it does not cost you a penny to click through them. I may make a few cents if you buy something because the company pays me and this helps me pay for blog expenses. Thank you 🙂 .
Anyways, the boys were busy yesterday making homemade gifts for relatives. They both had an idea of what they wanted to make and got it done pretty quickly, all things considered. These cute small paper bags made for some great wrapping paper too! I bought them at a local craft store.
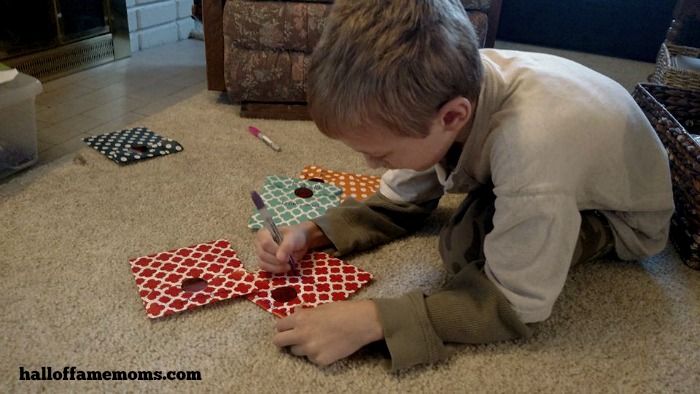
Another thing I’ve been preparing for is our upcoming family diy ornament-making party. To save money I’ve been shopping sales and the dollar store. Today I decided to make a few samples of the ornaments I’ve chosen for our family crafting party. I completed an owl and a ribbon tree today. I also have a yarn ball and painted toilet paper tubes drying.
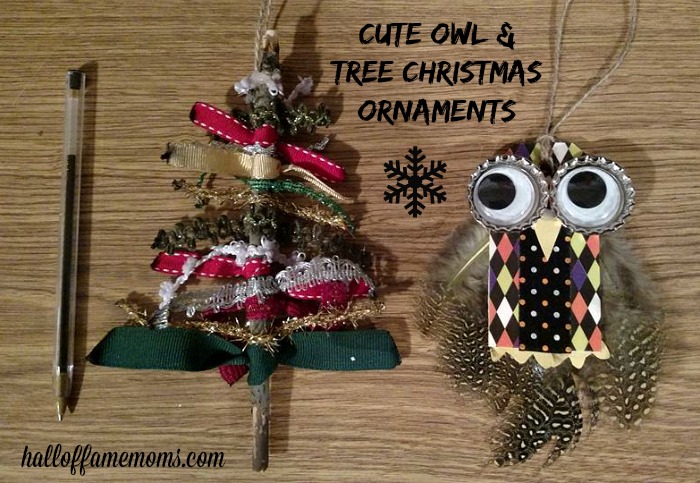
I plan to share more info on how I made the owl in another post, it’s more involved than the ribbon tree. If you want to know how I made the ribbon tree… read on.
DIY Ribbon Christmas Tree Ornament
This one is really simple but did take some time to create.
What you’ll need…
- sticks or twigs from the yard (approximately six inches long)
- ribbon (see my note below)
- twine or yarn
- scissors
- hot glue or other glue
- (optional) lighter
You may find some of these items at the Dollar Tree, too! Dollar Tree Weekly Ad
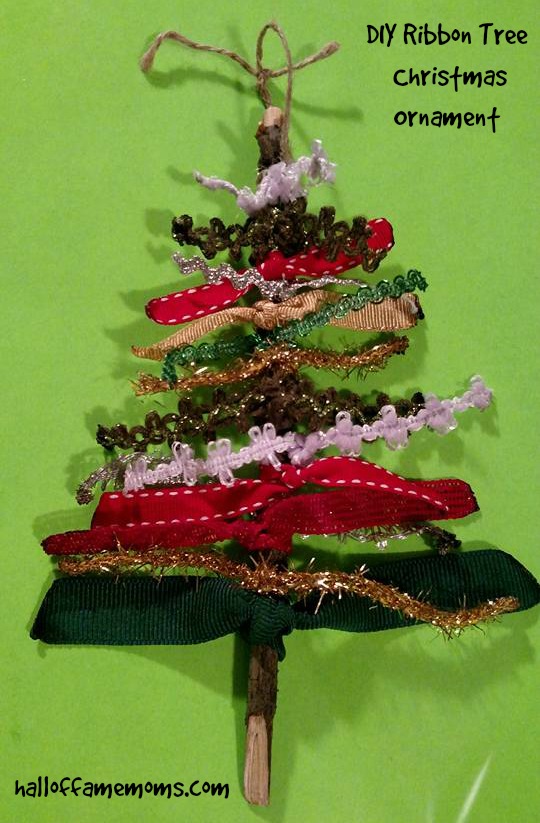
It’s really simple! Basically you’re tying (in knots) your ribbon to the stick and then trimming it with scissors. To finish, just tie a bit of twine or yarn to the top in a loop and hot glue to make it adhere better. Now, about the lighter…
The tutorial I followed suggested using a flame to burn or heat the edges of the ribbon to avoid fraying. I did that and that is why I have some black on my ribbon. Be careful! Some of my ribbons caught on fire quickly. Be ready to blow out a flame if you do this. Obviously, this part requires an adult.
Note about the ribbon: I came across a great deal regarding ribbon at Pat Catan’s. If you don’t have a variety of ribbon already on hand it can get pricey trying to buy a variety of rolls. Catan’s had these 12 inch/ 10 pc value packs (called Trim Accents by Darice) of a variety of coordinating ribbon for $1 each! I bought about six packs = $6. I’ve linked to an example of what I’ve found on Amazon so you can see.
I’ll try to share about some of the other ornaments when they are finished; and, I might share some pictures from our actual diy Christmas Tree Ornament party afterwards, too. That party isn’t until next week.
Are you doing anything special for the holidays this year? Feel free to share in the comments. I’ll be reading them all and answering back!

I want to see them if you do! Be sure to tag me on Facebook if you post a picture or post on it! Thanks again for the comment. 🙂
Very cute! I want to make some of my own Christmas ornaments this year.